VPN
With ThinVPN your devices reach the company network securely from home. The VPN technology underneath is NetBird — the open-source platform by the German company of the same name (ZTNA over WireGuard). You set up the connection once and then enable individual clients with a click. You find everything under the VPN navigation item in the sidebar.
Before you start
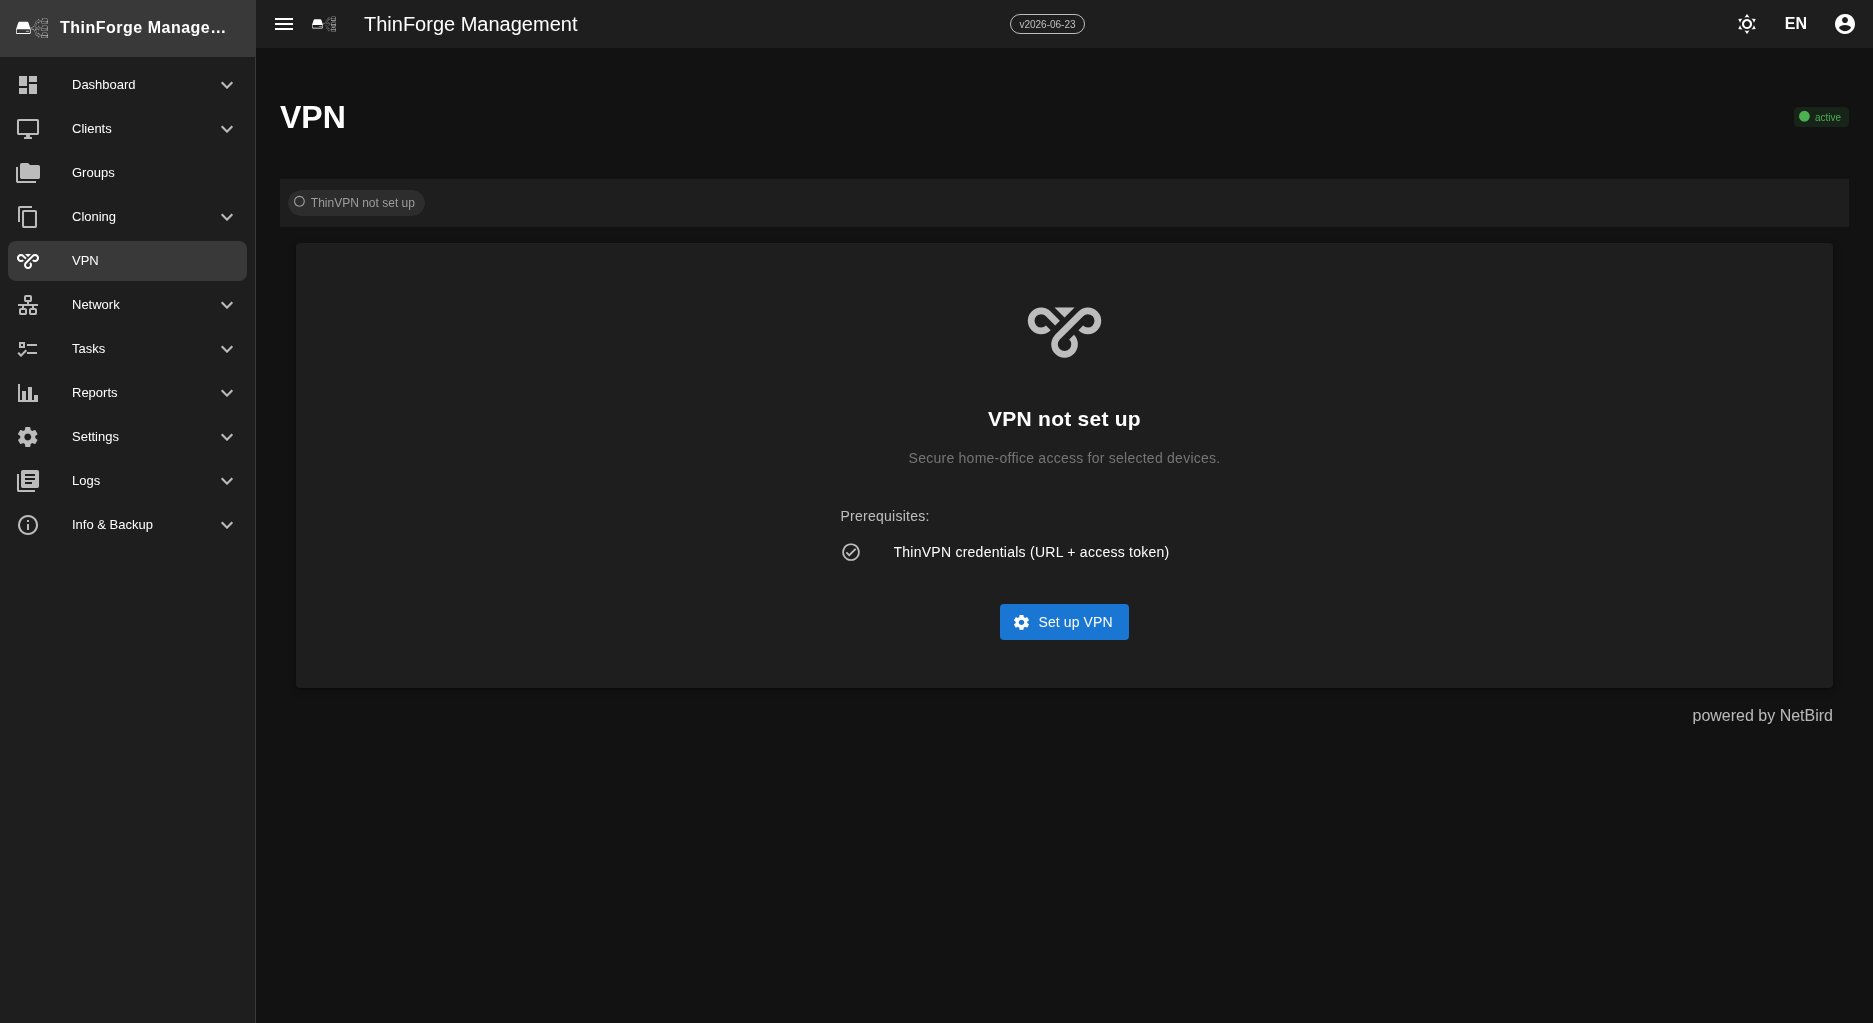
While no connection exists yet, the tab only shows the "VPN not set up" card with a setup button. To get started you need the two details (URL and key) that you receive after booking the VPN option from thinforge.org:
- ThinVPN address — the full address of your VPN server, e.g.
https://vpn.yourcompany.com. - Access token — the key you receive from thinforge.org after booking the VPN option.
Setting up VPN
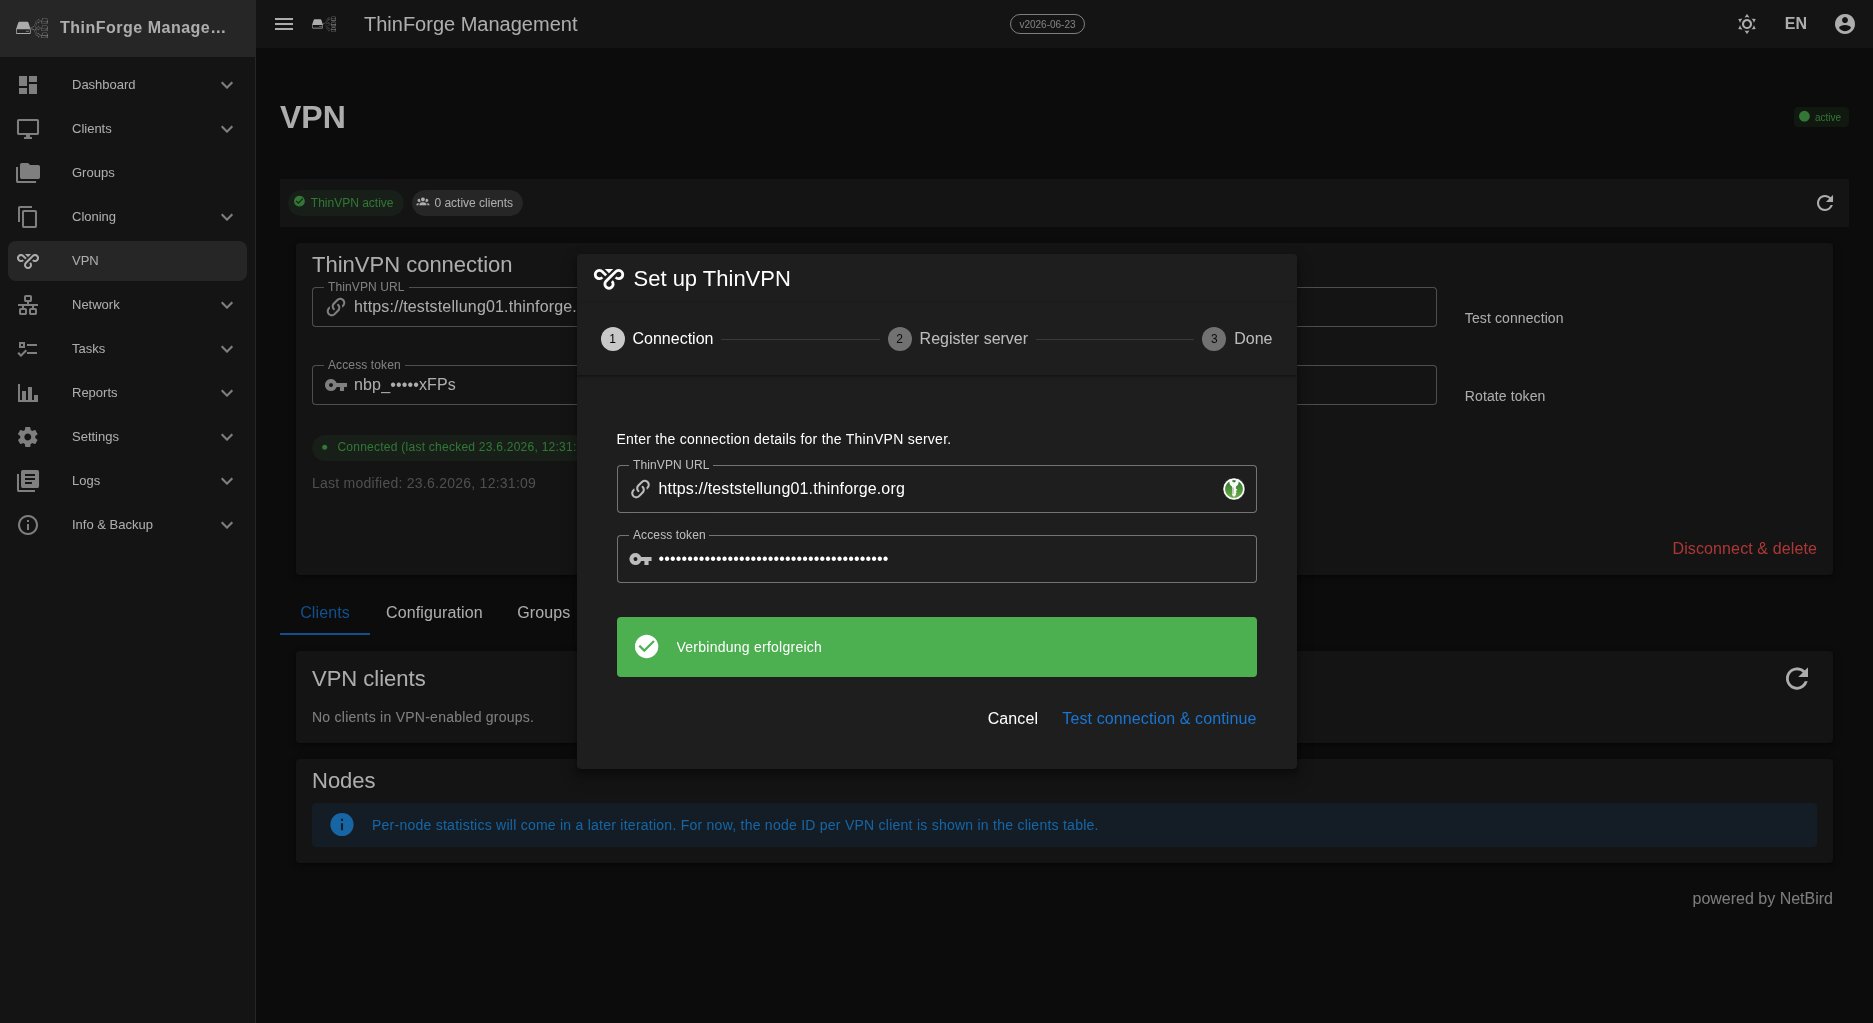
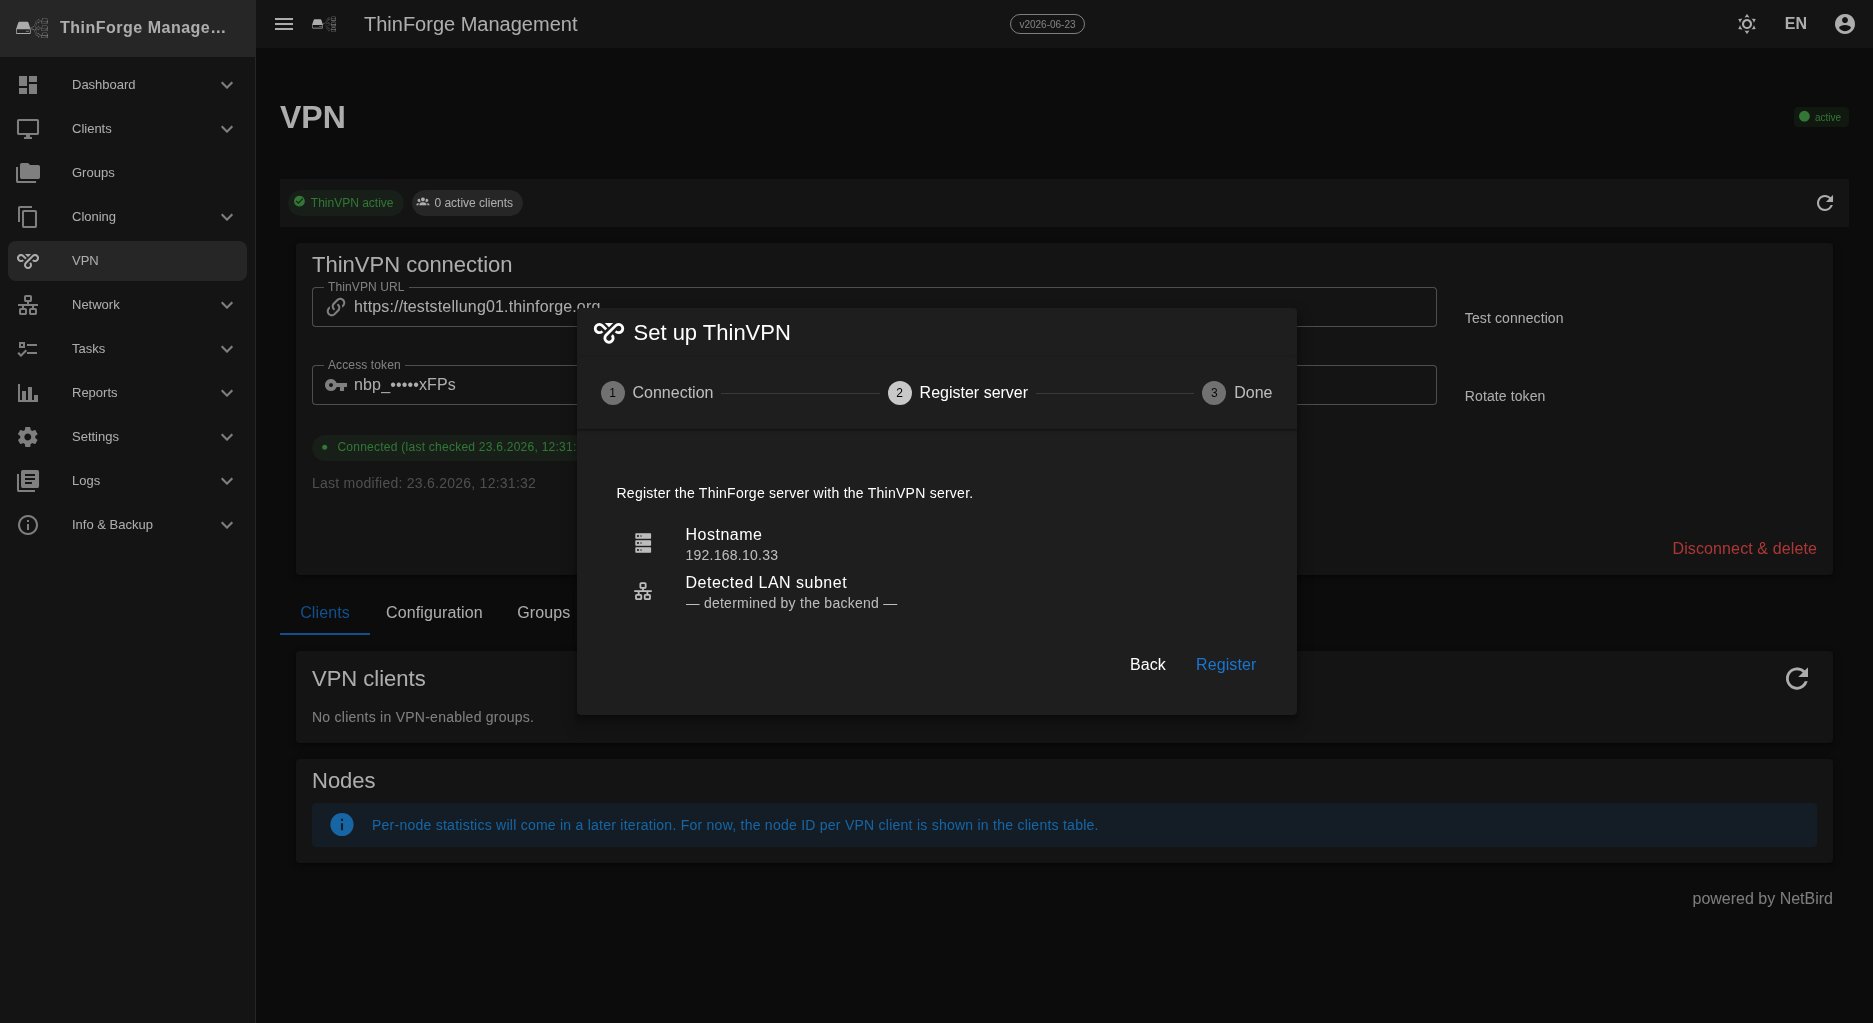
Clicking "Set up VPN" opens a wizard with three steps:
- Connection — enter the ThinVPN address and access token, then "Test connection & continue".
- Register server — the ThinForge server registers with the VPN server. The detected hostname and LAN subnet are shown.
- Done — confirmation that setup is complete.
After that, internal names (such as hosts of your local domain) resolve automatically through the tunnel on your devices. This requires a local domain set in the Network area under DNS.
The VPN view after setup
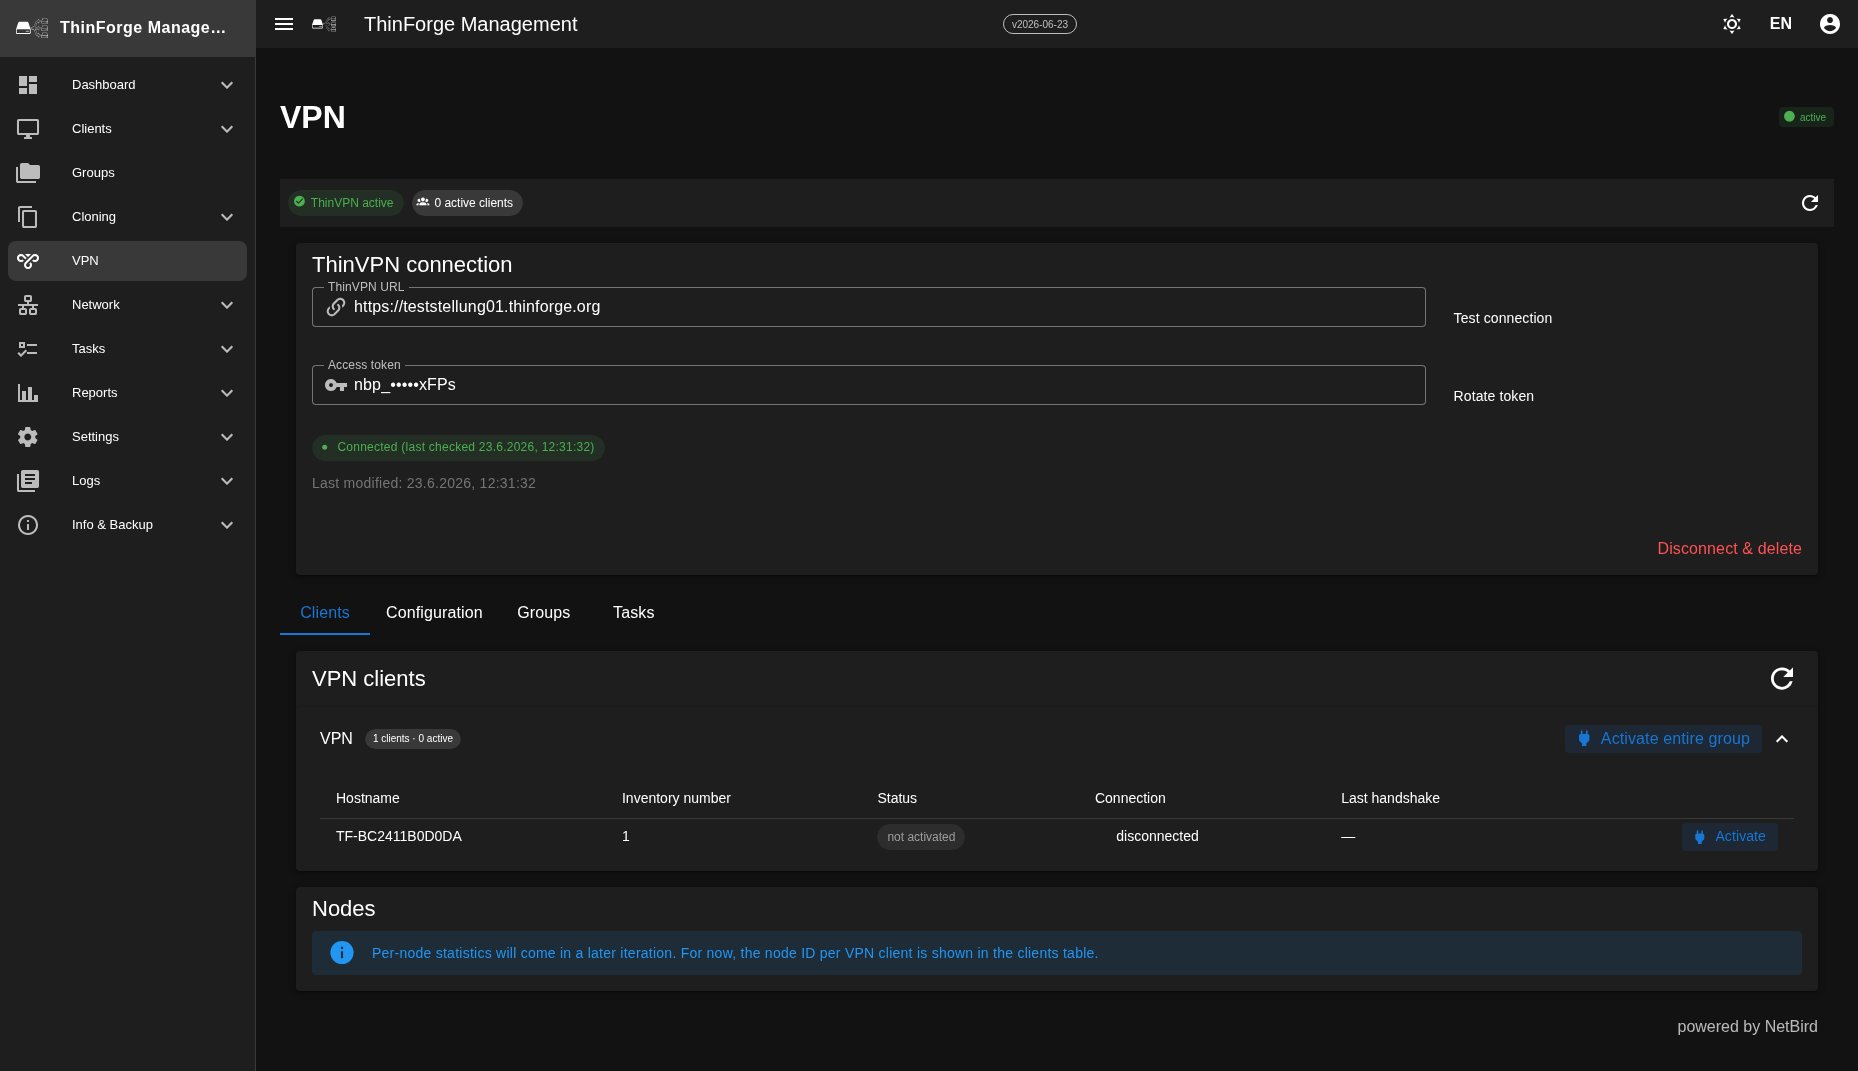
Once everything is set up, the view shows a Status at the top (a green "ThinVPN active" chip and the number of enabled clients) and the Connection card with the current address and status, with the actions "Test connection", "Rotate token" and "Disconnect & delete".
Below that you find several tabs:
- Clients — a table of all known devices and their VPN status.
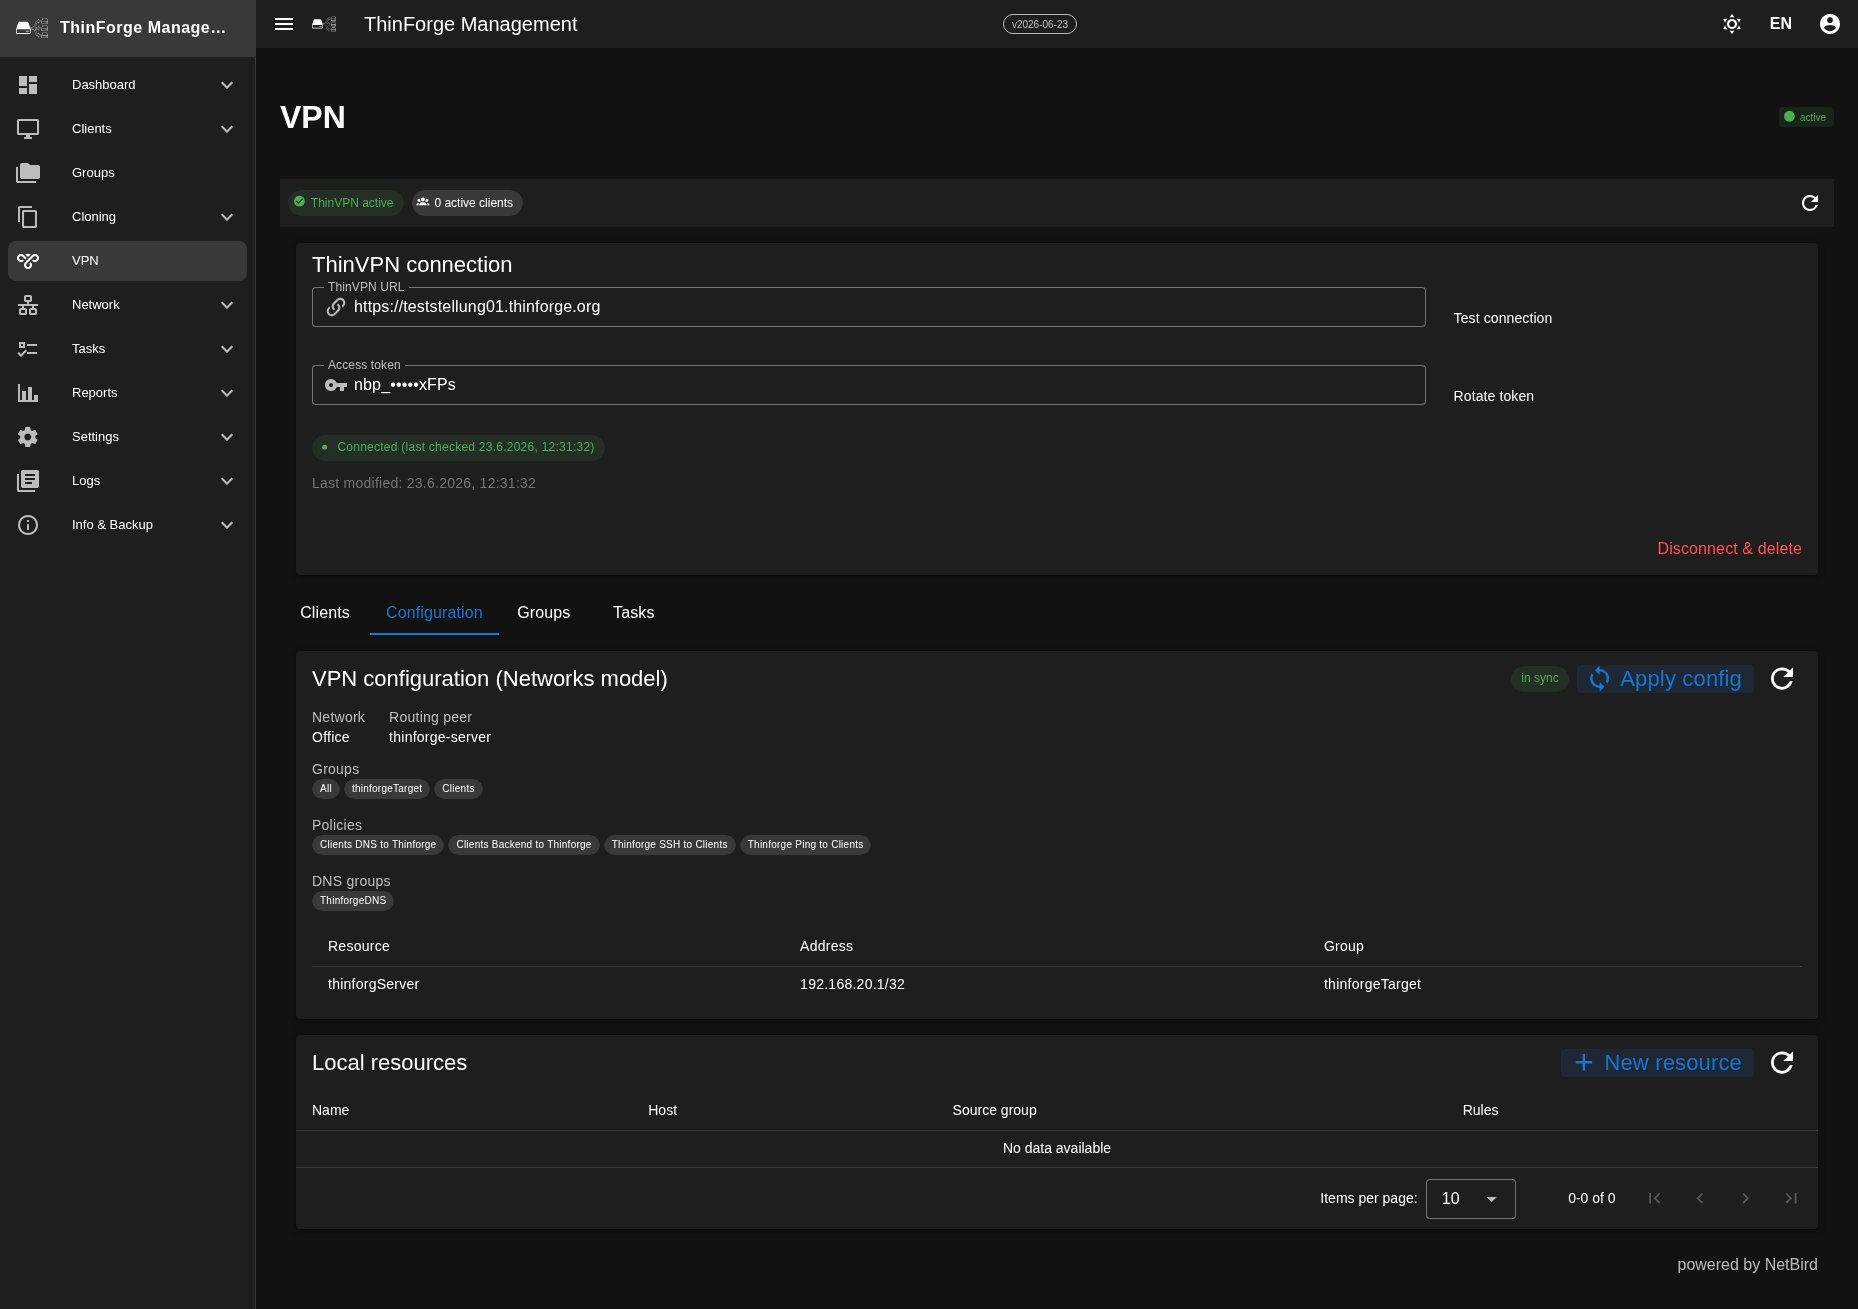
- Configuration — the reconciled VPN state and the allowed connections (Local resources).
- Groups — the VPN groups.
- Tasks — the running and completed VPN tasks.
Configuring groups, clients and allowed connections
In the Groups tab you manage the VPN groups. A group is a named collection of devices — it is later used to grant allowed connections to a specific selection of clients. Use "New group" to create a group with a name (e.g. "Accounting"). The Peers column shows how many devices are currently in the group. Three system groups are fixed and cannot be deleted; you can freely create and remove any further groups.
In the Clients tab the devices are organised by the group they belong to. When you enable a device (action "Enable"), the dialog lets you pick the group the client joins — prefilled with the default group "Clients". This group membership decides which allowed connections apply to the device. A client has no address rule of its own; its access follows solely from its group.
The actual allowed connections (Freigaben) are defined in the Configuration tab. There, the upper card shows the reconciled target state (network, routing, groups and existing allowed connections) read-only; with "Apply config" a changed state is pushed to the VPN server immediately. Below it, in the Local resources card, you create an allowed connection via "New resource". An allowed connection consists of:
- Name — a label for the allowed connection (e.g. "W22").
- Host address — the target that should become reachable: either a single IP (a single host, e.g.
192.168.20.3) or a whole network range in CIDR notation (e.g.192.168.20.0/24). - Source group — the group whose members are allowed to reach the target (prefilled with "Clients").
- Access rules — one protocol per rule (TCP, UDP or all) and the allowed ports (comma-separated).
An allowed connection cannot be edited afterwards — to change one you delete it and create it again. Using the delete icon in the row removes an allowed connection after a confirmation and deletes it from the VPN server right away.
Enabling and disabling devices
In the VPN clients table each device has an actions column:
- Enable — ThinForge prepares the device and enables it at the next sync. Once it connects, the status changes to "active". You can prepare devices well before they go home — the activation never expires.
- Disable — after a confirmation, VPN access is revoked immediately and removed from the device. You can re-enable it at any time.
After that the client builds the tunnel fully automatically as soon as the device is outside the company network — the employee does not have to start, click, or enter anything. In the office, i.e. on the ThinForge server's LAN, the client tears the tunnel down again by itself, so the direct network access is used there.
Frequently asked questions
Does the remote employee have to do anything? No. The VPN client starts automatically when the device runs outside the office and switches itself off again in the office.
What if a device is lost? Disable the client in the VPN tab — access is revoked immediately.
What if the VPN server is briefly unreachable? Existing connections keep running. New activations are only possible again once the server responds.
Why do I see "VPN tier limit reached"? Your plan allows only a certain number of active clients. Disable a device you no longer need or upgrade your license.