Network
The Network menu gathers ThinForge's infrastructure side: the server interfaces, DHCP for booting new devices, DNS and PXE boot. The view is split into four tabs: Local Network, DHCP / DNSMASQ, DNS and PXE Boot. Remote access via VPN lives in its own VPN menu.
Local Network
Shows every network interface on the server with its current IP, MAC address and link status. In daily use this is mainly an overview — for instance to see which interface carries traffic, or to verify the management interface is online before a rollout.
DHCP / DNSMASQ
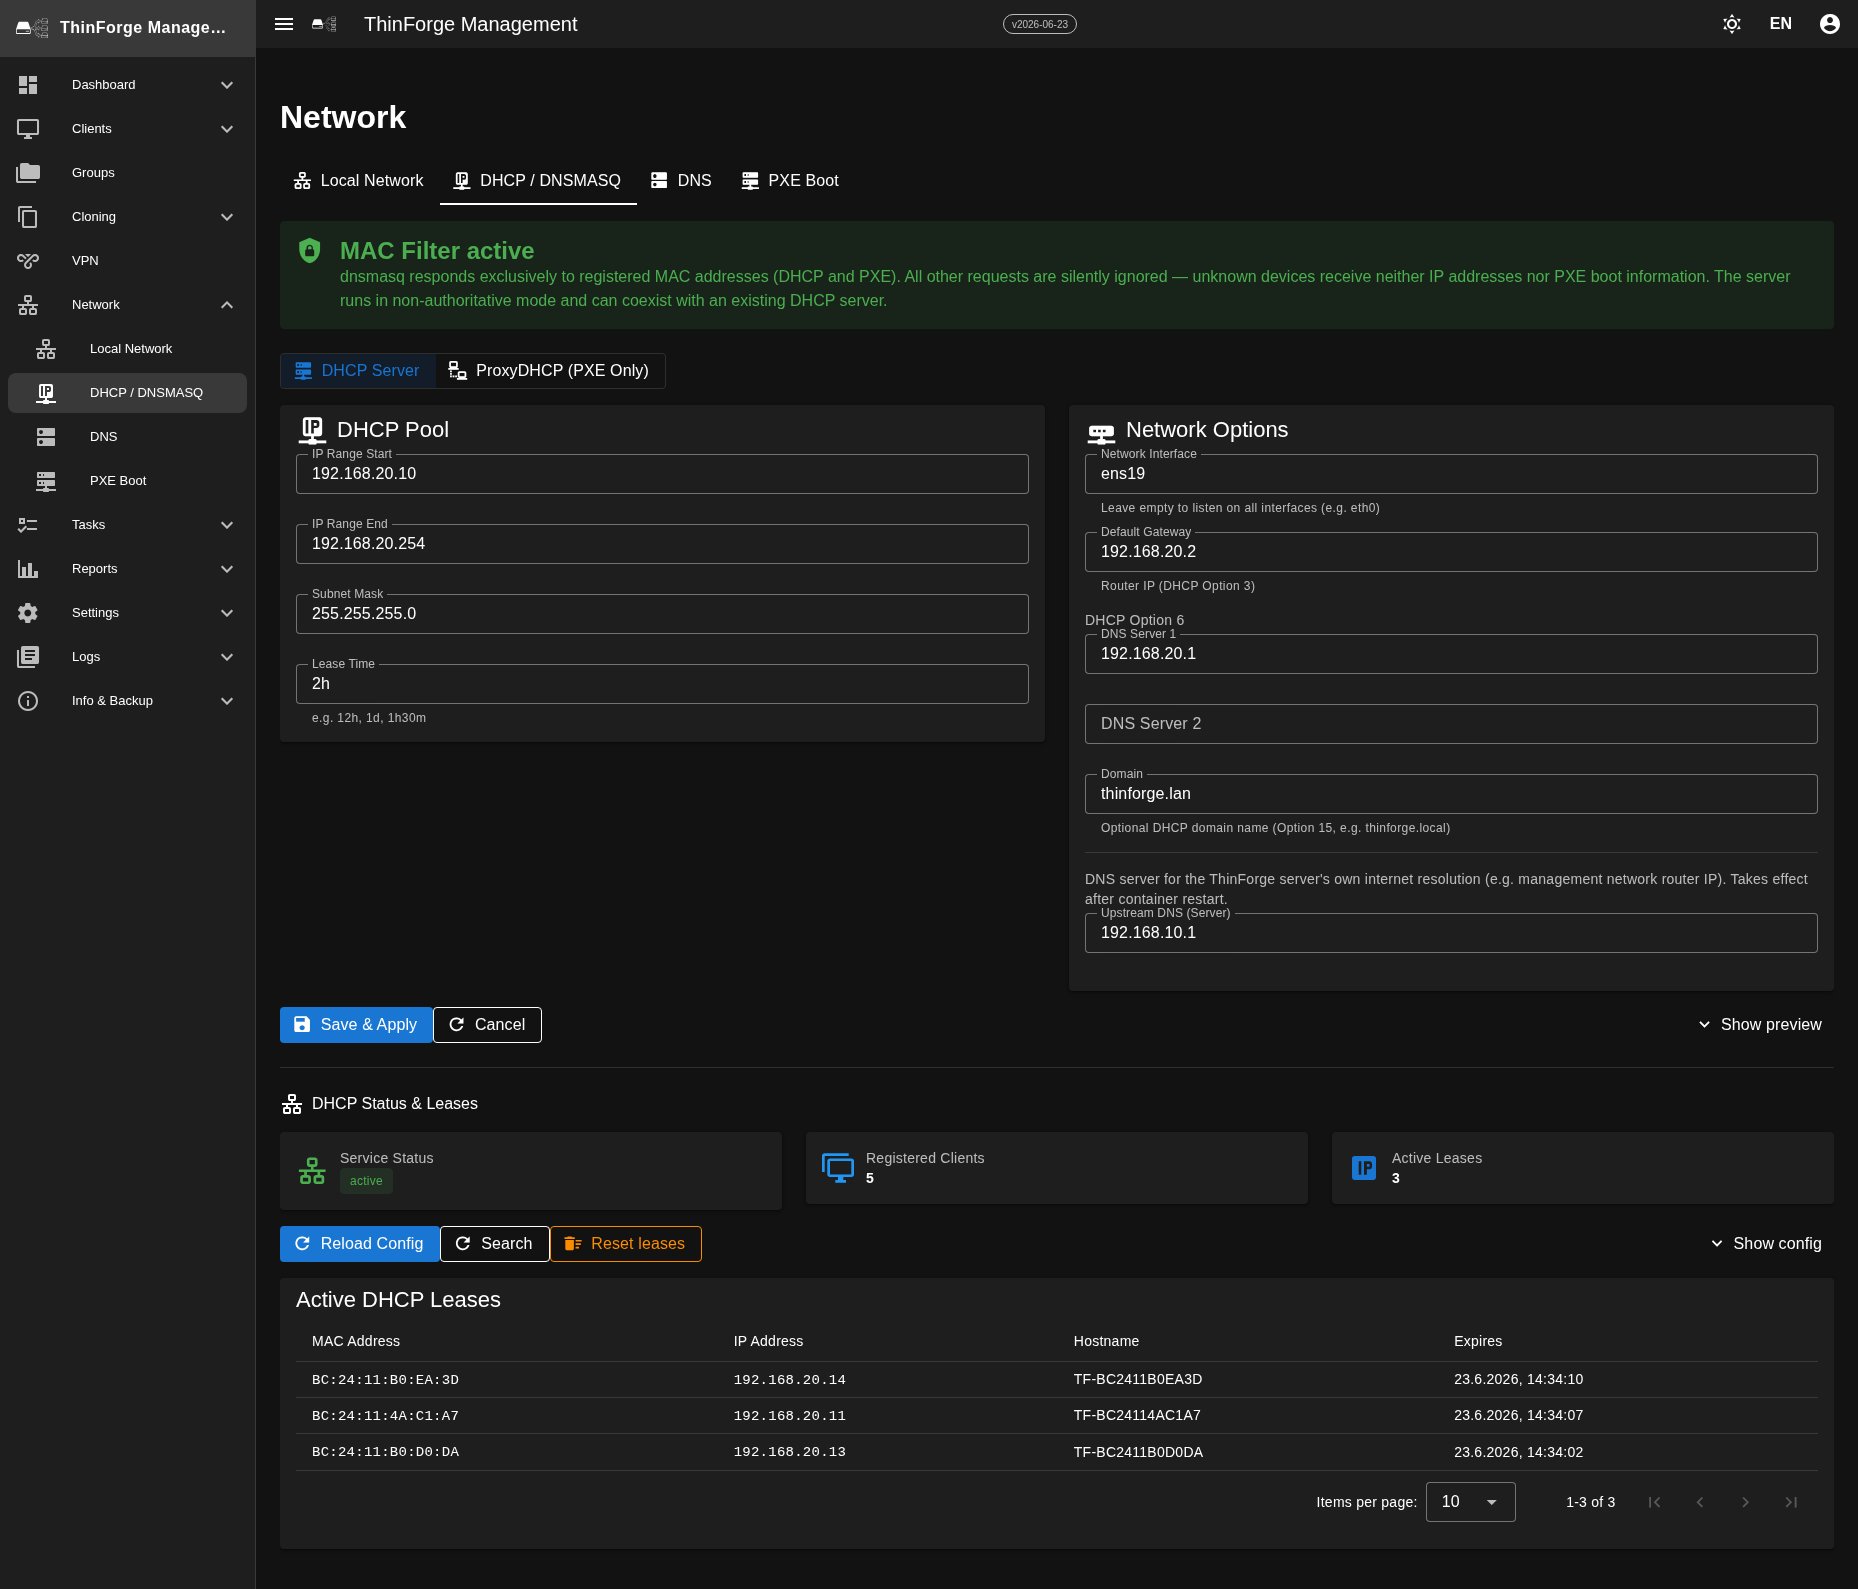
Here you configure the management subnet and the DHCP leases that new devices get their IP from.
| Field | Meaning |
|---|---|
| Subnet | CIDR of the management network, e.g. 192.168.10.0/24 |
| Gateway | usually the ThinForge server IP; you can also point it to an internal firewall here |
| DNS | upstream DNS for the clients |
| Rollout IP range | pool that devices draw a temporary IP from during PXE boot |
| Lease time | validity of the IP assignment, default 12 hours (format e.g. 12h or 1d) |
| Domain suffix | optional, e.g. .thinforge.local |
DHCP addresses are handed out only to known (registered) clients — unknown devices are ignored. A device must therefore exist in the Clients list before it boots via DHCP/PXE. The Leases area lists the currently-assigned IP addresses (MAC, IP, hostname, expiry) — handy to check whether a registered device has received an IP.
DNS
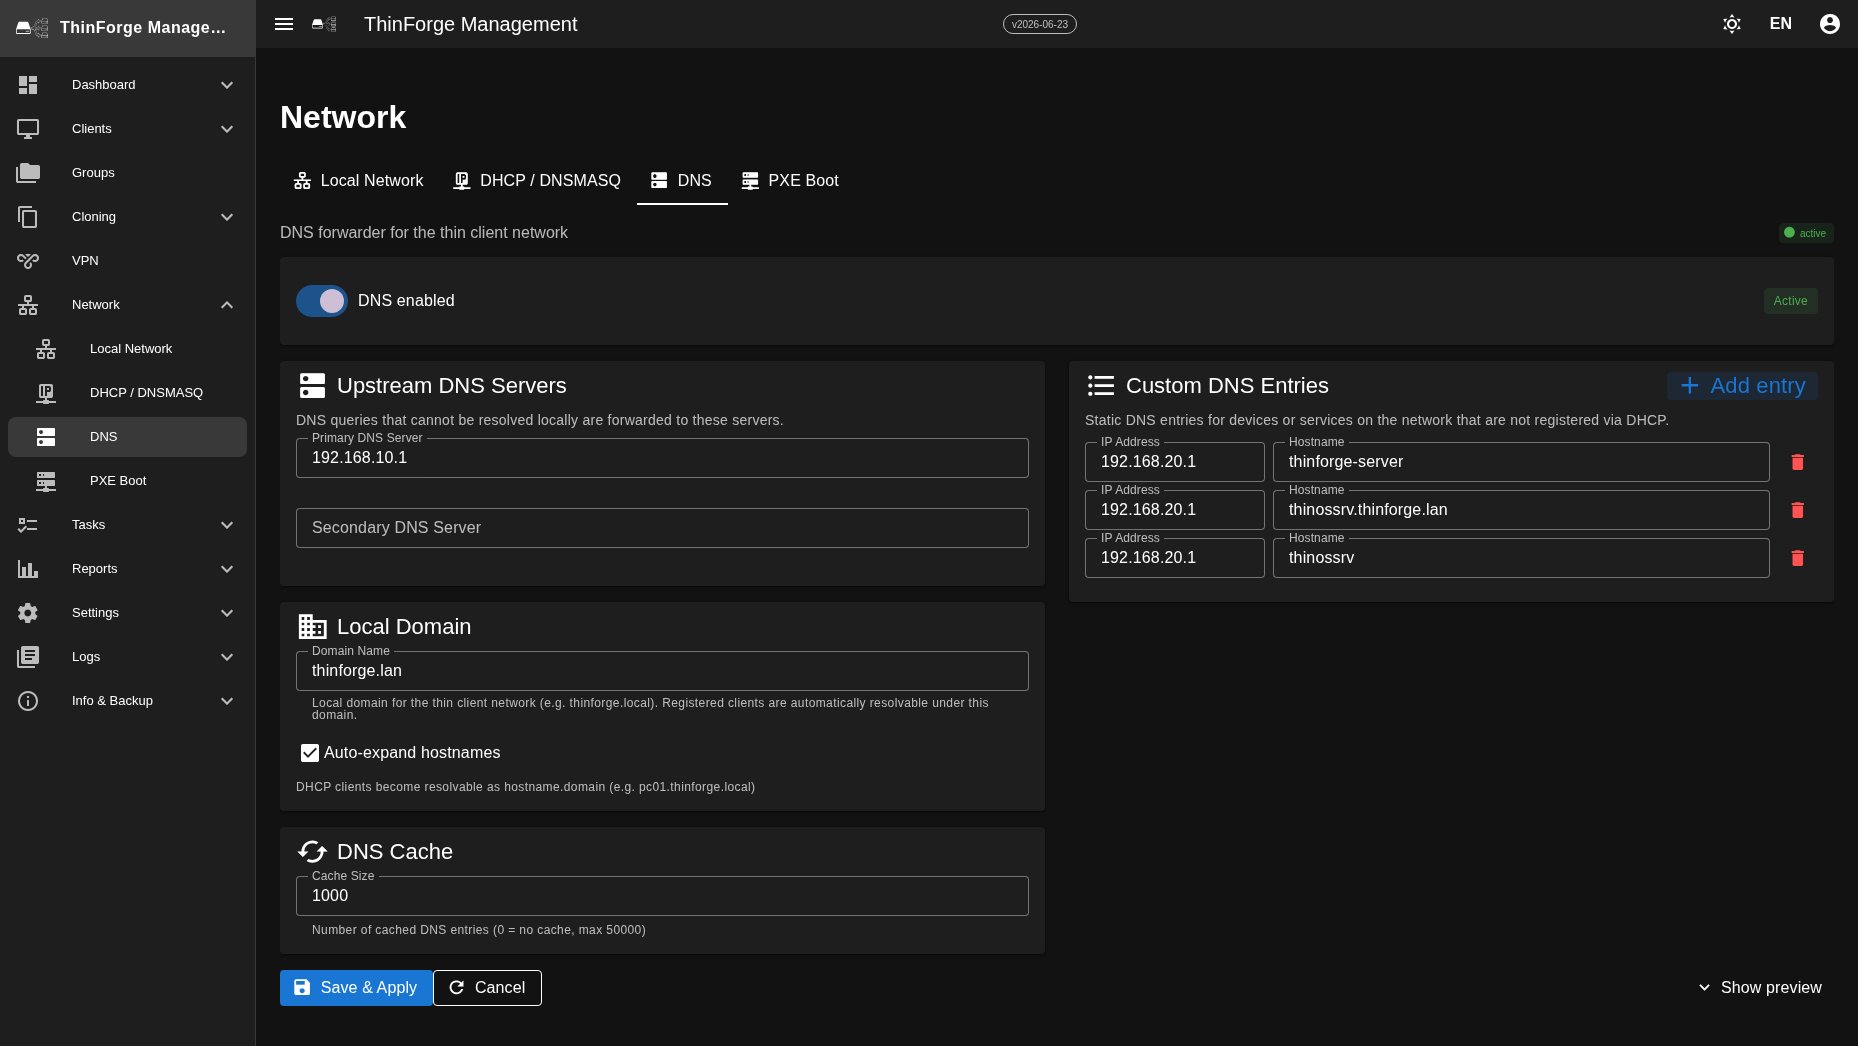
Two settings:
- Upstream DNS — which external DNS servers are queried when a name is not known locally. For branch offices often a central corporate DNS.
- Local domain — the internal zone (e.g.
thinforge.local) that clients automatically receive as a search suffix.
PXE Boot
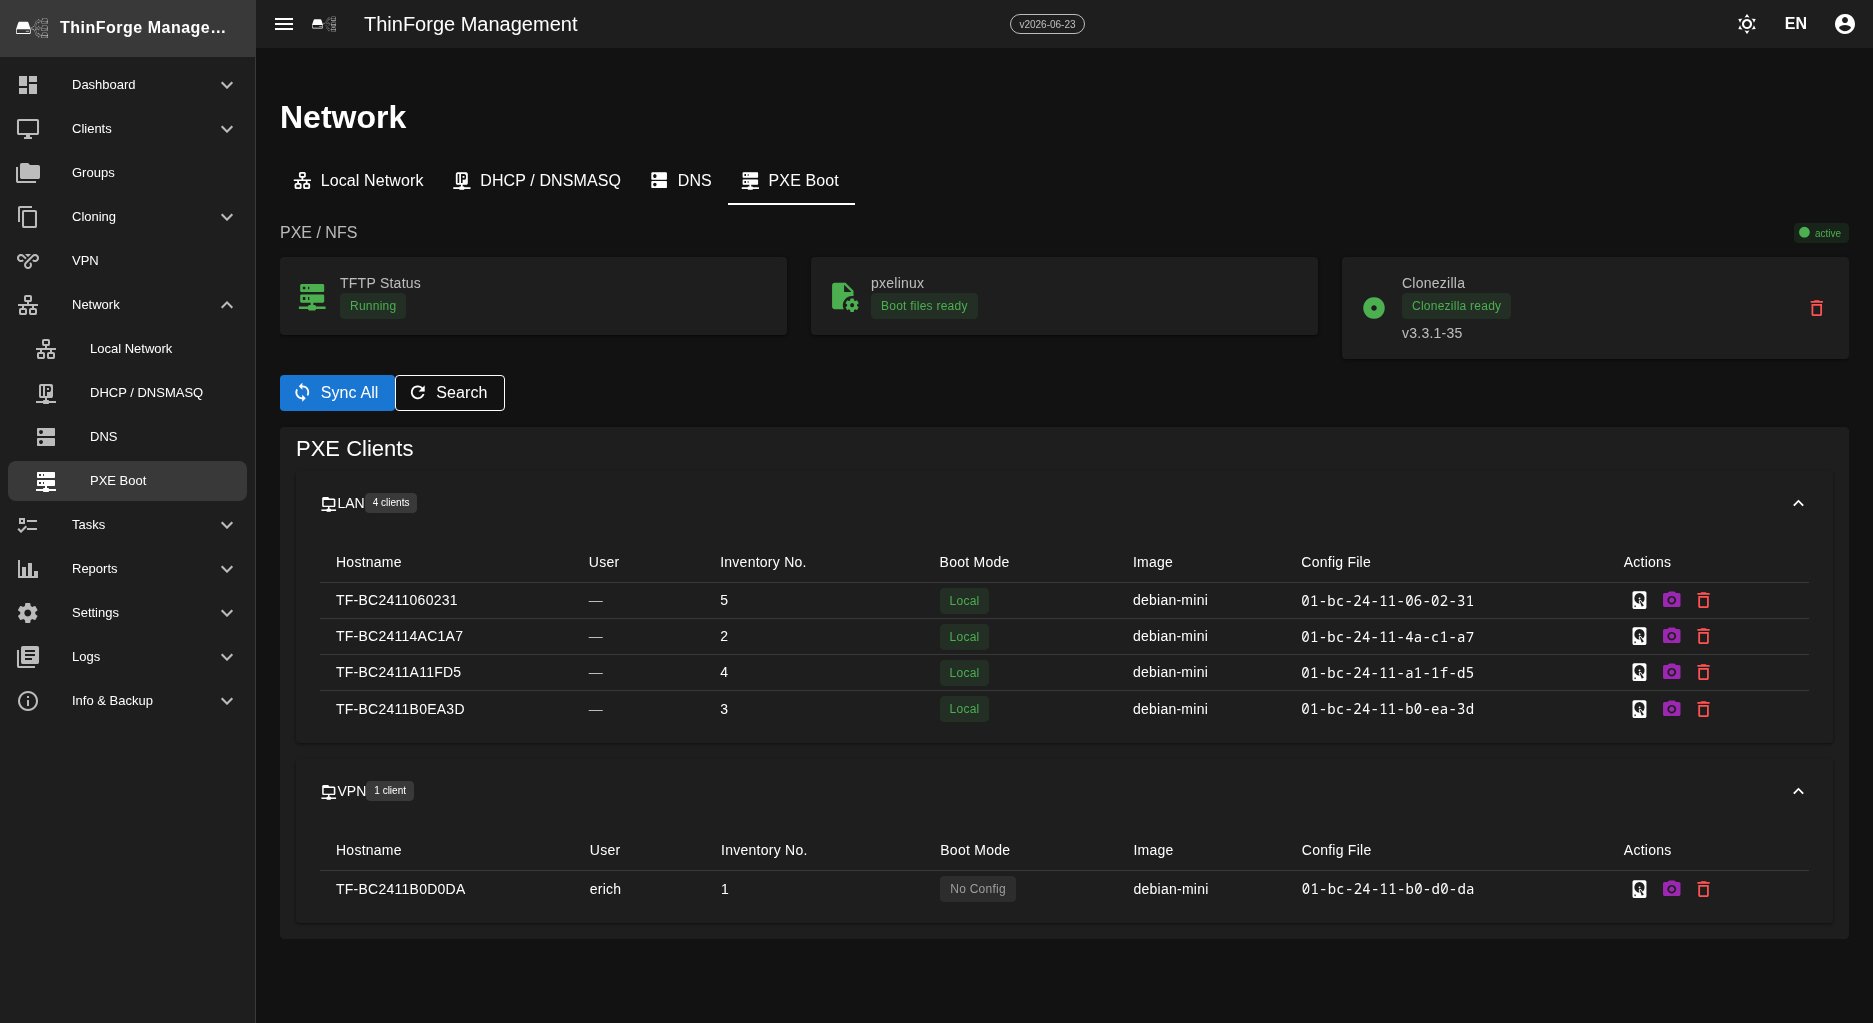
This tab bundles the boot infrastructure and the boot modes of all clients in one place. At the top, three status cards show whether the TFTP service is running and whether the PXE boot files and the Clonezilla image (for capture/deploy) are ready — if something is missing, Clonezilla can be downloaded directly or uploaded as an ISO.
Below, all clients are listed grouped by group, each with hostname, current boot mode, assigned image and config file. The boot mode can be set per client directly — reset to Local, trigger a Capture, or delete the boot config. These are the same boot modes as in the Clients detail view, here just centralized for all devices at a glance.
If a device does not boot, the most common cause is that it has not been registered yet — unknown MAC addresses get no DHCP and therefore no boot chain.
VPN
For secure access to clients outside the local network — field service, home office, branch offices — ThinForge uses a VPN. It has its own menu entry: everything about it is on the VPN page.
Branch offices
With multiple locations that each have their own local network, clients usually connect via VPN to headquarters. Recommended:
- A dedicated group per location.
- BitTorrent rollout instead of unicast — devices in a branch distribute the data internally among themselves.
- No multicast over VPN — multicast only works on the local network.