Cloning
The cloning area is where you create the disk images (clones) that are later distributed to your thin clients. The view is organised into several tabs; the most important are Create VM, ISOs, Captures and Clones — together they cover the entire image lifecycle.
The workflow at a glance
- Create the base HD — set up the cloning VM's base disk in the UI. Important: without this base disk layout, delta-update functionality cannot be guaranteed.
- Upload or download an ISO and boot the cloning VM with it.
- Install the operating system. For the restart, stop the VM, check that the ISO is no longer selected (otherwise the VM boots into the installation medium again), then start it — now it boots from disk. Then install the agent and customise the system.
- Create a delta update — save the image via "Save update delta & create clone" (e.g.
v2026.06.22-001). - Change it later: start the VM, modify, click "Save update delta" again → another image (
v2026.06.22-002,v2026.06.22-003, …). - Rollout: the clients pull the image (see Rollouts).
Create VM
The cloning VM is a virtual machine on the server that serves as the template for all clones. A status bar shows whether it is active, inactive or currently in a transition.
- Start VM — pick an ISO (or "no ISO" if an OS is already installed), confirm the resources (RAM, CPUs, disk size), start. After a few seconds it is bootable.
- Console — operate the VM right in the browser: click through the installer, set up software, let updates run. The clipboard is supported; use "Open in new tab" to show the console in its own window.
- Stop VM — shuts the VM down.
ISOs
Here you manage the installation ISOs that serve as boot media for the cloning VM. The list shows file name, size and upload date.
- Upload ISO — a
.isofile from your local machine. - Download by URL — ThinForge fetches the file in the background and shows progress live. Convenient for large images straight from the vendor's mirror.
An ISO can only be deleted when no active VM is using it. The Tools ISO is built automatically by the server and is used for the initial setup of new thin clients via USB stick or PXE. It is rebuilt every time the cloning VM starts — so after a certificate renewal you simply restart the VM.
Create an image from the VM
In the Create VM tab you turn the VM state into a deployable image (the VM must be stopped). The dialog picks the right mode automatically:
| Button | Result | When? |
|---|---|---|
| Create baseline | takes a baseline snapshot of the VM and starts a new version chain. | the first time (no clones yet) or for a clean new chain |
| Save update delta & create clone | creates a delta against the previous version and a complete, deployable clone image. | for every further image — after updates, patches or new software |
The "As new baseline" option forces a fresh chain at any time. Versions are assigned automatically in the format vYYYY.MM.DD-NNN (date plus a daily counter), e.g. v2026.06.22-001; in the dialog you only add a short comment. The operation runs as a background task (progress here and under Tasks & Logs); a full image takes 10–30 minutes depending on disk size, a delta usually only a few minutes. Use Cancel to stop a running operation without harming the VM.
Captures
The Captures tab, in contrast, captures the disk of a physical client: the device boots into a capture environment (Clonezilla) via PXE, and its disk state is saved as an image. You pick the client, give it a name, and decide whether the device shuts down or reboots afterwards.
Clones
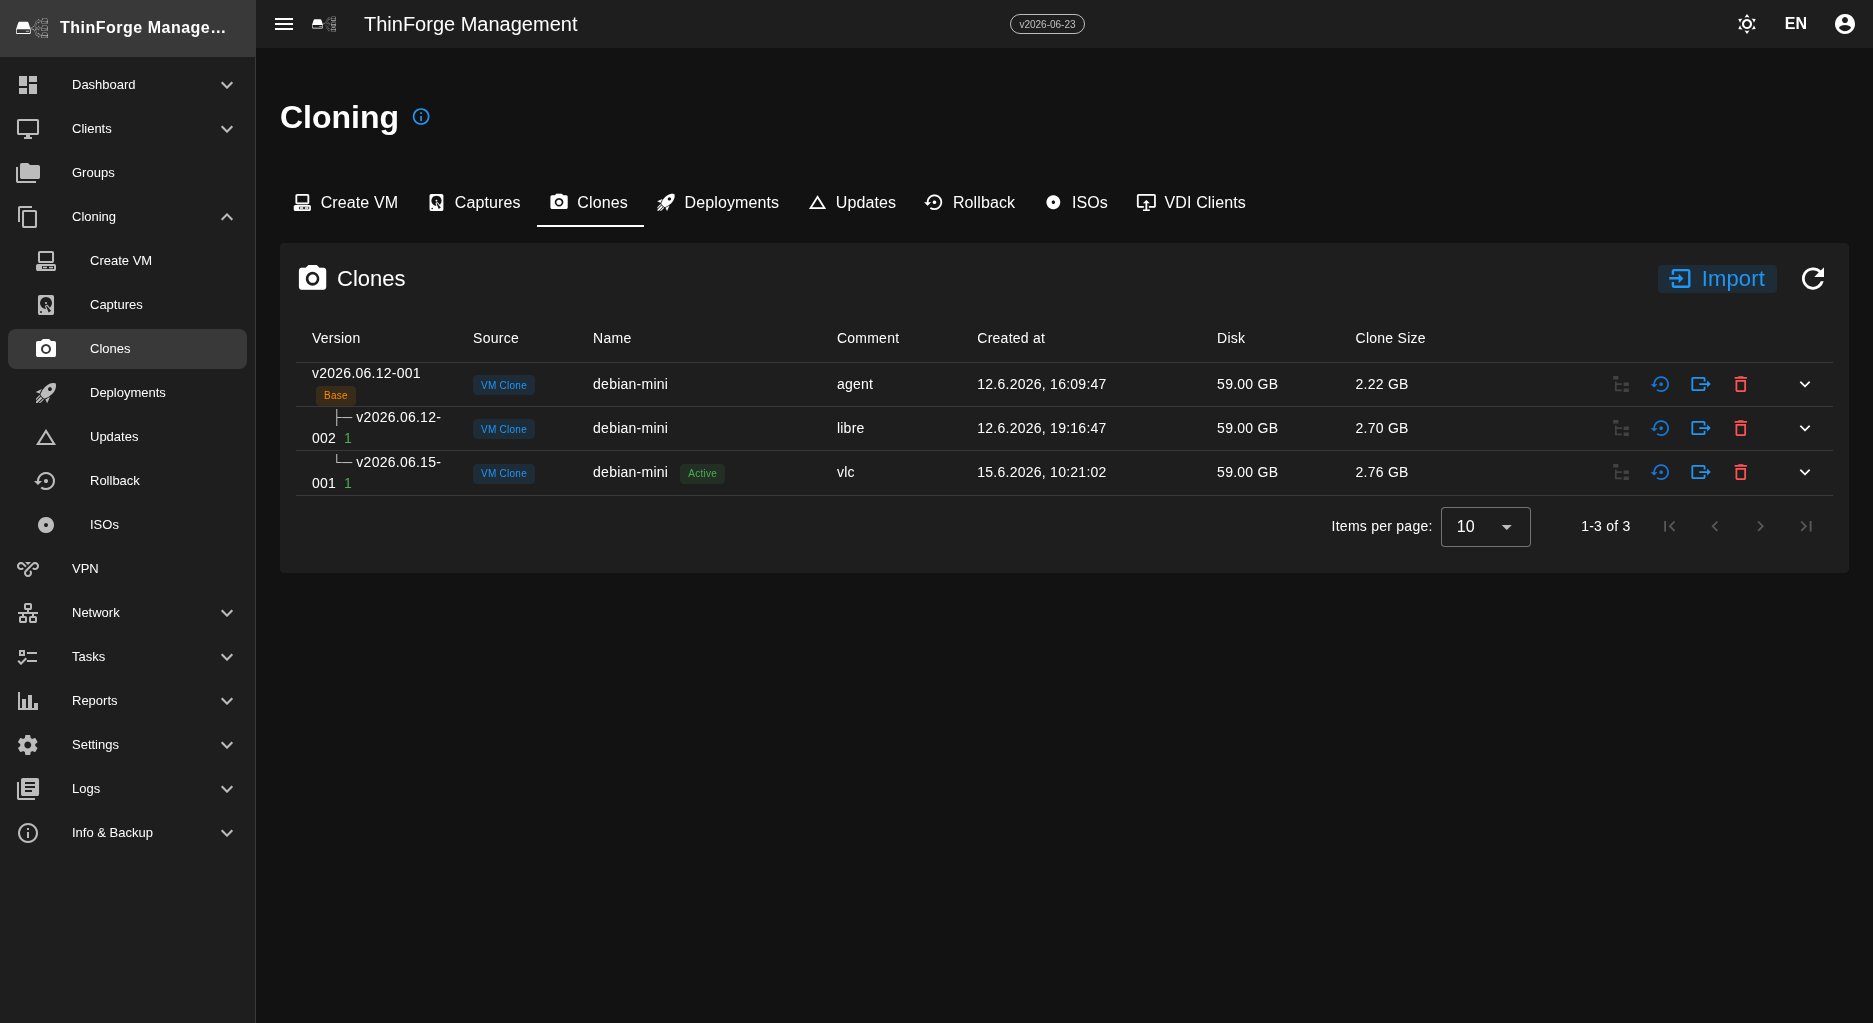
The list of finished images, ready to roll out. Clones are shown as a version tree: baselines as roots, deltas as flat siblings beneath them. This makes it easy to delete individual updates without breaking the chain. The base of a chain is determined automatically — it is the root of the version chain (the lowest version with no parent) and is shown as a marker.
Per clone, the following actions are available, among others:
- Show details — size, comment, creation date and the agent version at capture time.
- Reassign / sort in — move the clone to a different position in the tree, insert it before another clone, or detach it into a standalone baseline. These steps change only the arrangement, not the image itself.
- Restore — write the clone back onto the cloning VM. This lets you switch back to an older version at any time. Make sure the clients end up on the older version too — either via a new deployment or via the rollback (which can only restore the immediately previous version).
- Export — download as a 7z archive.
- Delete — only when no clients use this version and no deltas depend on it.
VDI clients
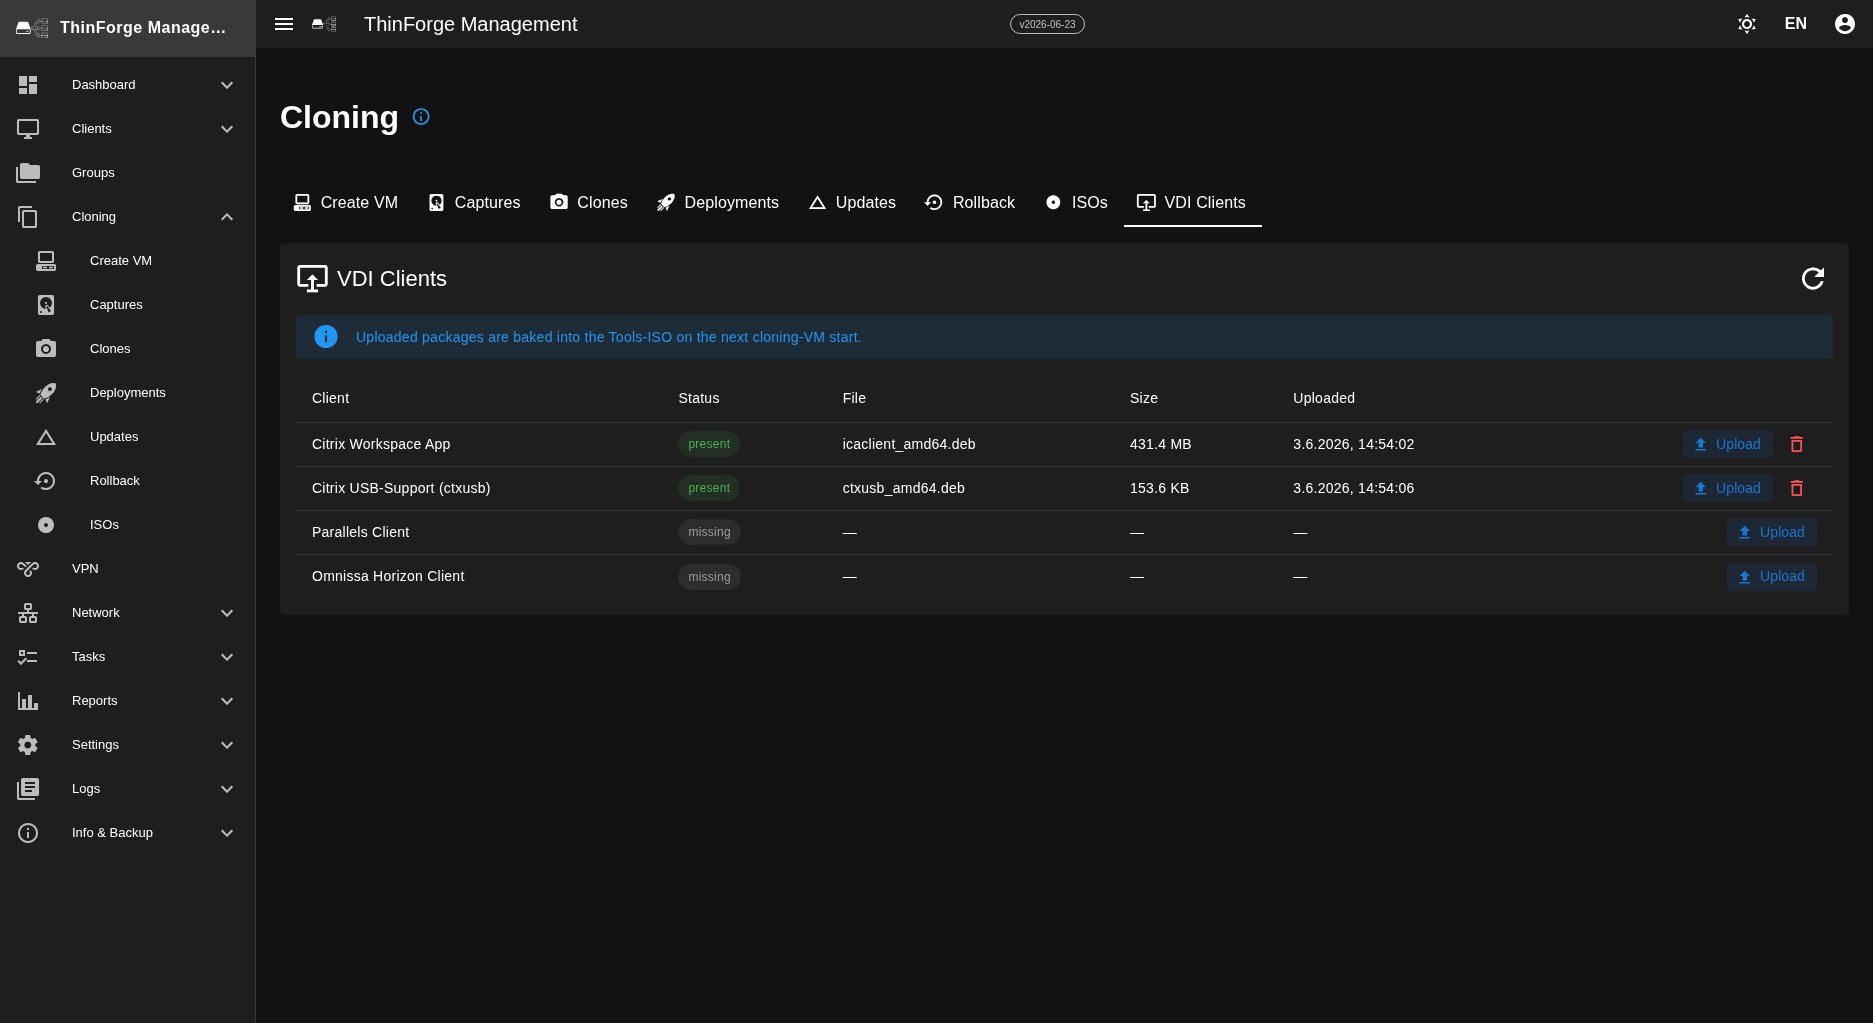
The VDI Clients tab holds the installation packages of the common VDI clients — Citrix Workspace App, Citrix USB support (ctxusb), Parallels and Omnissa Horizon. Uploaded packages are automatically baked into the Tools-ISO the next time the cloning VM starts, so they are ready when provisioning the thin clients.
Keep an eye on disk space
Clones can grow large. You see the values on the Disk Usage card of the Dashboard. Typical cleanup:
- Delete old baselines that are no longer distributed — only when no clients still use them.
- Consolidate long delta chains via a new baseline and drop the old chain.
- Delete unused ISOs.